Use this method if you need to “target” a specific area that you want to change.
First, Go to Settings > Easy Google Font.
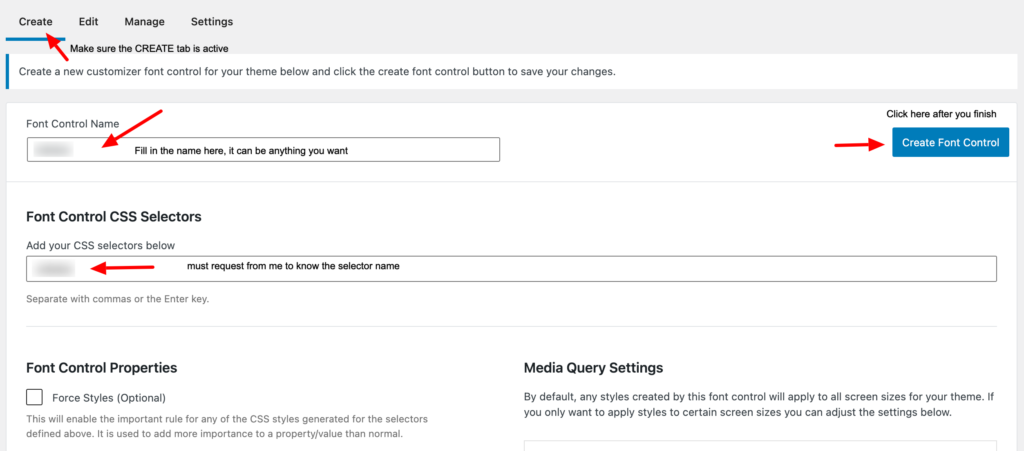
Make sure the “Create” tab is selected, fill in the name for this new area (Font Control Name) and also the class name of that area (under Font Control CSS Selectors). See image below. For the class name, you have to contact me first and request it from me. Send me a screenshot of the area that you want to change and I will help you with the class name. Contact me via email or Etsy DM.
Note : make sure you added , (comma) after you input the class selector, if you do not include , (comma) the CSS selector will not be saved (it will be ignored).
Second, Go to Appearance > Customize > Typography > select Theme Typography > Select the font control name that you created before. You will see the name of the font control that you created in first step. Select that.
You will be able to change the typography of the selected CSS selector here.