Before you add menu or navigation to your blog, make sure you have created the Pages you needed (click here if you need tutorial to create a page). If you want to have categories page in your menu, make sure you already created the categories too (click here for tutorial creating new category).
- Go to Appearance > Menus
- Click : Create a new menu.
- You must name your new menu under “Menu Name”, click “Create Menu”. If you don’t click create menu, you won’t be able to add items to it yet.
- After the left panel is available for your to click, start selecting the menu from the left panel, drag it to the right panel. This is your available pages, a place to add custom links (a link to your shop, to other website, etc), and you can also add categories link to your menu.
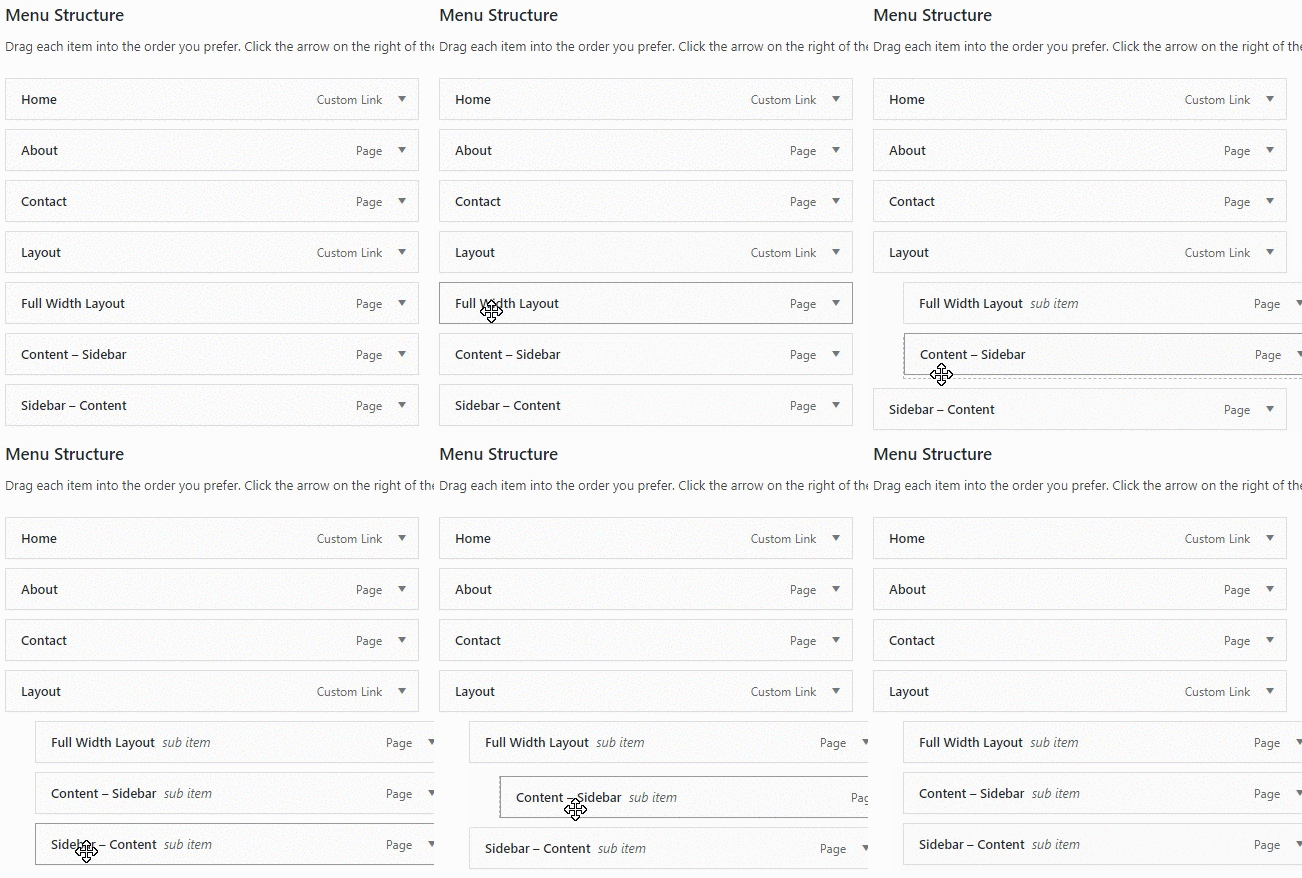
- To create a drop down menu, just drag the sub menus under the parent menu. See animation bellow :

- Under “Menu Settings” select the location of the menu (Header area – top bar). If you don’t select this, the menu won’t appear on your site.
- If you want to put a menu under the image logo / site title, create another menu and checked “secondary navigation” as the menu location.
